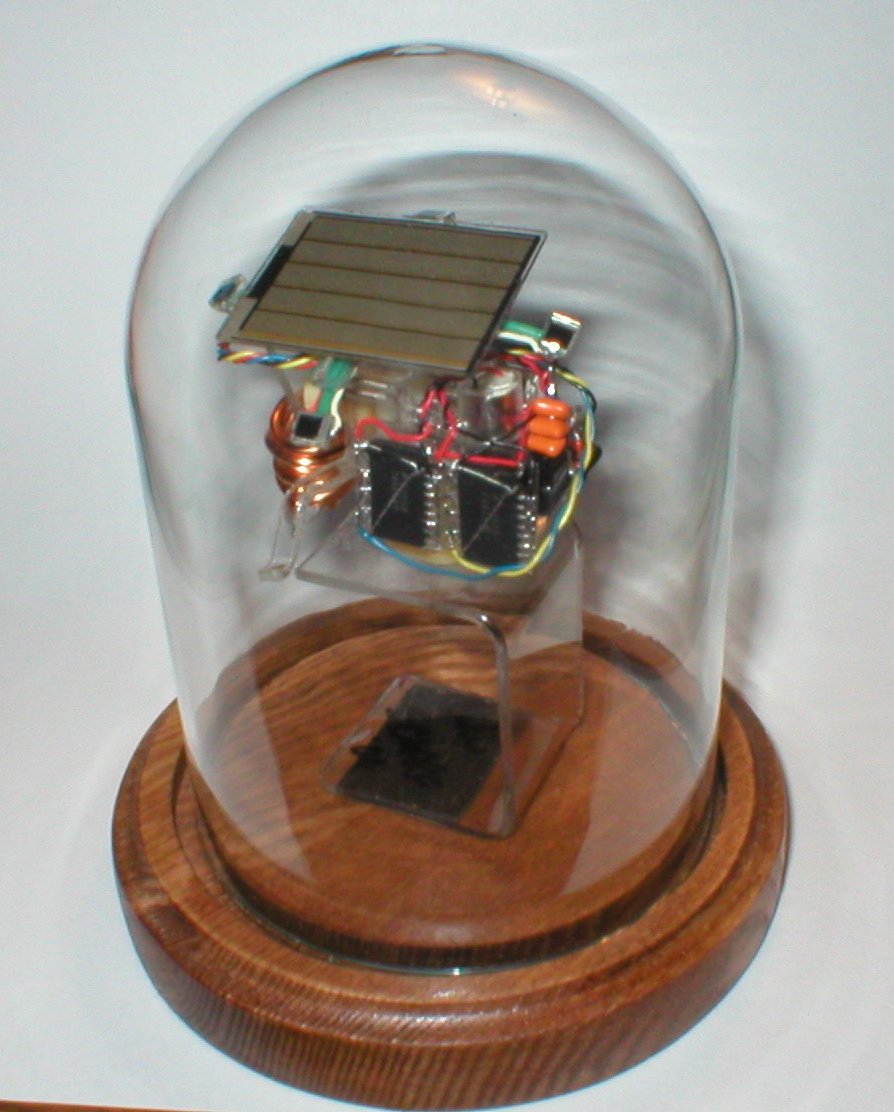
Little HUG
Here is Little HUG! He was completed on May 2, 2004. Now, I'll bet you're wondering how he ever got named, huh? Well,
Little HUG actually stands for Little Head Under Glass. Little HUG was constructed using clear plastic
normally used for welding hoods, a couple of nice gearmotors from
Solarbotics,
and some other standard BEAM pieces.
Little HUG's main enjoyment in life is looking at bright light. He's always pointing his solar panel toward
the brightest spot he can see. He likes hanging out under my desk lamp but occasionally wants to look at the sun.
He hopes one day to ride on top of a walking robot, guiding it towards bright light. This type of robot is important
because most of my robots are powered by light. So in order to survive on their own, they have to be able to find
their "food".
 TN.JPG)
Little HUG was an interesting little project. I wanted something very simple yet very active.
The Panasonic Sunceram Solar panel I used was probably a little overkill for use in the direct
sunlight, but was just the ticket for use under my lamp. I generally build all of my robots
to work under a desk lamp so that I can enjoy them indoors. This also falls under the BEAM Philosophy
in that they don't require any "special" location to live in (i.e. the windowsill).
 TN.JPG)
Little HUG's Ballasted Solar Panel
Here you can see the ballast that offsets the weight of the solar panel assembly. By balancing
the moving section of the bot, energy use is greatly reduced. The up/down motor only has to
redirect the solar panel assembly and not lift it. The process of balancing took quite a while
to get just right, but the results made it worth every minute. The wire I used
is the kind used for making bead jewelry or something. Anyway, I found it while in a craft
store with Susie and thought it was shiny. MMmmm.. I like Shiny things!
 TN.JPG)
 TN.jpg)
Solar Engine side
Here you can see the Miller Solar Engine. The 3 orange things stacked on top of each other are the timing
capacitors. Each one is .1uF for a total of .3uF. This Miller SE uses the 1381E voltage detector giving
it a trigger voltage of 2.63 volts. Now if you're wondering what in the heck I'm talking about, check
out
this page at Solarbotics.net for
a complete description of the Miller Solar Engine as well as many other voltage triggered SE designs.
The blue barrel shaped thing below the silver motor is the main power storage capacitor. Much like
a battery, it stores the electricity coming
from the solar panel. When the voltage is sufficient on this capacitor, the Solar Engine briefly
discharges the power storage capacitor into the main circuitry.
The main circuitry
These are the brains. Each black rectangle is a 74AC240 Octal Inverting Buffer chip. The
circuit they are used in is called a Bare Bones Photo-Head. This circuit was developed by
by a fellow BEAMer named Grant McKee. If you would like to see his other circuits or his inspiring
collection of robots,
click here. I
originally wanted to have a nighttime flasher or something on the bot. But that got lost
in the chaos and it was impossible to add enough ballast to support the extra solar panel.
This was the first robot I used Surface Mount Devices on.
These are VERY small solder connections! Construction of the brain took about one hour.
This is the actual schematic for Little HUG. It's a very simple and efficient light tracking
circuit. This design could be used to direct any number of solar panels towards the light. It
would be great for larger robots with many solar panels to maximize power.
Sensor Wiring
Underneath the solar panel you can see the wires leading from the light sensors to the brain.
The information these sensors provide determines which way each of the motors will turn. These
sensors are actually small 1/8 inch solar panels!
Being able to look left and right is pretty simple. But when you can ALSO look up and down,
your odds of seeing something are much better. Little HUG is a 2 Degree Of Freedom Head, which simply
means he can follow a target passing directly overhead. Pretty cool huh?
That's the wooden base I bought for a buck. Notice the whole robot is attatched to the base
using double sided foam tape (servo tape). I like to use this mounting method for solar panels
too. It provides a more compliant connection to absorb shock and vibration. For some other
tips and tricks, please visit my
Techniques section.
And so there it is! I really learned alot by building Little HUG. I'll just bet there will be
many more Little Heads in the future!

.JPG)
.JPG)
.JPG)
.jpg)
.JPG)
.JPG)
.jpg)

.JPG)
.JPG)
.JPG)